- Home
- Commission a portrait
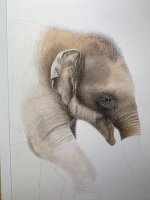
- How to Photograph Pets
How to photograph pets for realistic drawing references
I am often asked how to photograph pets for pencil portraits.
For an artist to create an accurate drawing of your pet it is necessary to supply them with a great photo to work from. It needs to be in focus with plenty of detail in the eyes and nose. Of course, there is more to pet photography than that, as you will want the artwork to show your pet's character and personality.
Often pet owners like yourself will worry that without the skills of a professional pet photographer, or an expensive DSLR camera, they will be unable to provide a suitable image. However, with a few tips, it is possible to learn how to photograph pets with any type of camera.
Who knows your pet best? You! Who is there to capture those special expressions? You!
Of course, you do need to keep your phone or camera to hand whenever you are with your pet or you may miss the magic moment.
Let's look at what makes a good reference for a drawing.
How to Photograph Pets - Focus
Getting your pet in focus, especially the eyes, is important to the success of your portrait.
If the artist cannot see any detail in the eyes it is difficult to capture the essence of the animal. If they are blurry, too dark or not visible, the image would not be suitable to draw from.
The problem amateur photographers face is that a camera will focus on either what is in the centre of the viewfinder or on what is closest to the lens.
If your pet is off to one side, then the centre point may be over a section of background, meaning that will be lovely and sharp, but the pet will be blurred.
If the autofocus system looks for the closest thing, this could be the dog's nose or something in front of the animal. Again the eyes will end up blurry, making the photo unusable.
 The camera focused on the background and not Alfie the cat.
There are ways around this...
- Focus on the eyes, press the shutter button down half-way and hold it, move the camera so that the eyes are where you want them (i.e. off centre) then press the button down fully without jogging the camera. The technical name for this is focus and recompose.
- Set the camera into single-spot focus mode if it has one. This time you should see a little box on the screen that you can move around with the camera controls. The camera will use this box as the focus point, so position it over the animal's eye and take the photo.
- Some expensive cameras have animal eye autofocus, which is said to work for dogs, cats and birds. It will grab focus on the eyes and follow them around the viewfinder as the animal moves.
Something else that can help avoid blurry shots is using a fast shutter speed on the camera. This will freeze any movement and eliminate camera shake.
Shoot at Eye Level
Many of the snaps I am sent as a pet portrait artist have been taken by adults who were standing looking down at the pet. This is an important lesson when learning how to photograph pets.
Pointing the camera down can create perspective issues, with the resulting image looking more like a caricature than a real animal. Those parts closest to the camera will be enlarged and out of proportion to the rest of the pet.
The example below illustrates this, as the labrador's head is much larger than his back end. There is also hardly any eye visible, so this would not make a good reference.
 Taken from adult height, which has distorted the dog's proportions
If, instead, the photographer had bent or sat down so that their eyes were on the same level as the dog's, they would have captured a better image.
The next picture was taken from a sitting position, one step down from the one the dog was laying on, which is an improvement.
There are still issues, though. The head appears too big, as do the feet, as they are closer to the photographer due to the angle she was sitting. The dog's eyes are too dark and resemble black holes!
You may have noticed the red lawn mower grass box in the background but that is less of an issue as it could just be left out of the drawing.
Although this works reasonably well as a photo, that partly obscured back leg and missing toes on the left front leg wouldn't make a great portrait. Missing body parts is another issue faced by pet portrait artists regularly. It isn't easy to recreate them if they are not present in the photo.
 This photo was taken from the dog's eye level, but still has issues
OK, time to 'fess up. The dog above is my dog Finn, and I was the photographer. We all make mistakes from time to time!
One thing I did get right was to take many pictures during this photo shoot. If I wanted to draw just Finn's head, this next photo may have given better results. The eye is in focus as well as being at my eye level.
 Taken at eye level with the dog's head and eye in focus
The photo here has been reduced in size, but in the original, you can see the light in the eye.
 A cropped version of the photo of Finn above
However, there is still a problem. Can you tell me what it is without scrolling down?
Something to mention in passing here is that there is a clear division between what is DOG and what is BACKGROUND in this image, which always makes it easier to create a drawing.
Get Close But Not Too Close!
To answer the question above - Finn's head only took up a small area of the entire photograph, meaning there was a lack of definition or detail. It should have taken up more of the photo if I had wanted to draw just his head.
However, I was using a mobile phone camera for this photo session and getting closer would have distorted the image.
I would have achieved a much better result if I had instead used my mirrorless camera from further away but with a zoom lens.
I am not the only person to make the mistake of not getting close enough. For example, you will find the photo reproduced below on Louis's page. Luckily we found a more suitable photo and his portrait turned out lovely.
 This photo was taken from too far away for a pencil portrait
Getting the Light Right
For outdoor photos, try to place your pet in a shady area, out of direct sunlight as this will avoid harsh shadows.
For those wanting to learn how to photograph pets indoors, try to use natural light where possible. Light coming through a window can often work well but not always!
Take the following photos, for example. Bentley was fast asleep in the armchair with bright light streaming through the window behind him. In the first photo, the exposure was correct for his back, but the areas of the picture not receiving light were much too dark.
 The bright backlight through the window resulted in a dark overly contrasty photograph of Bentley
Changing the camera settings did nothing to improve the situation, as this second attempt blew out the highlighted areas removing ALL detail in his white fur.
 Allowing more light through the camera results in blown out highlights and no detail in the white fur
The red rug on the floor reflected light up into the armchair, changing it from beige to pink in places!
The window light worked well in this photo of Polly, and I was very happy with the resulting commissioned portrait (shown in my Gallery of custom dog portraits).
 Polly, shows an example of window light that worked well
Take Lots of Photos!
I hope these pet photography tips have shown that you don't need fancy equipment to take photos that can work well for pencil portraits. Just keep in mind the points we have discussed here..
- Getting the focus spot on
- Getting down to eye level
- Getting close enough
- Getting the light right
Along with taking plenty of photos! There are sure to be some gems amongst them.
Would you like to keep in touch? Sign up for my occasional newsletter below.
Recent Articles
-
Magical Pencil Portrait Drawing Process That Will Blow Your Mind
 The pencil portrait drawing process step by step - see how a drawing takes shape with step by step photographs
 -
Chicken Portraits Immortalized in Colored Pencil Just For You
 Commission a unique colored pencil chicken portrait to capture the beauty of your feathered friend. Personalized art at its finest!
 -
How to photograph pets for a colored pencil drawing reference
 How to photograph pets to give to a pet portrait artist as reference material for your commission
Copyright © 2020-2024
Carol Leather
All Rights Reserved.